

Building an Astro 5 App with Cloudflare Pages and D1
Prerequisites
- Node.js
- Basic TypeScript
- Cloudflare Account
- Git
Loftwah’s Astro Guide
G’day mates, I’m Loftwah, and here’s my guide to setting up an Astro 5.x project using TypeScript, Tailwind 4, Cloudflare Pages with Functions, and Cloudflare D1 integration. I’ve also added a test CRUD (Create, Read, Update, Delete) example to show you how to handle data with D1.
Step 1: Set Up Astro 5.x Project
1. Clone the Template Repository (Optional)
If you want to use my template as a starting point:
git clone git@github.com:loftwah/cloudflare-template.git
cd cloudflare-template
Or start from scratch:
mkdir my-astro-site
cd my-astro-site
2. Create the Astro Project
npm create astro@latest- Choose a project name
- Select a template (like “Empty”)
- Configure TypeScript (Yes, strict)
- Initialize Git repository (Yes)
- Install dependencies (Yes)
3. Verify Your Installation
npm list astro4. Test Locally
npm run devVisit http://localhost:4321 to confirm your project is running.
Step 2: Integrate Tailwind
1. Add Tailwind to Your Project
npx astro add tailwindThis command installs required dependencies and creates the necessary configuration files.
2. Verify the Configuration Files
tailwind.config.ts:
import type { Config } from "tailwindcss";

const config: Config = {
  content: ["./src/**/*.{astro,html,js,jsx,ts,tsx,md,mdx,svelte,vue}"],
  theme: {
    extend: {},
  },
  plugins: [],
};

export default config;
src/styles/global.css:
@import "tailwindcss";3. Update Your Layout Component
Make sure your Layout component imports the global CSS:
---
// src/layouts/Layout.astro
const { title } = Astro.props;
---
<html lang="en">
  <head>
    <meta charset="UTF-8" />
    <meta name="viewport" content="width=device-width" />
    <title>{title}</title>
  </head>
  <body>
    <slot />
  </body>
</html>
<style is:global>
  @import '../styles/global.css';
</style>
Step 3: Configure Cloudflare Pages with SSR
1. Add the Cloudflare Adapter
npx astro add cloudflare2. Update astro.config.mjs
Make sure your configuration includes server output mode and the Cloudflare adapter:
import { defineConfig } from "astro/config";
import tailwindPlugin from "@tailwindcss/vite";
import cloudflare from "@astrojs/cloudflare";

export default defineConfig({
  vite: {
    plugins: [tailwindPlugin()],
  },
  output: "server", // Enable SSR
  adapter: cloudflare(),
});
3. Install Wrangler for Local Development
npm install -D wrangler4. Update package.json Scripts
Add a preview script for testing with Wrangler:
"scripts": {
  "dev": "astro dev",
  "build": "astro build",
  "preview": "wrangler pages dev ./dist",
  "astro": "astro"
}
Step 4: Add Cloudflare D1 Integration
1. Create a D1 Database
- Create a new D1 database in the Cloudflare Dashboard (Workers & Pages > D1)
- Note the database name and ID
2. Configure Wrangler.toml
Create a wrangler.toml file in your project root:
name = "cloudflare-template"
compatibility_date = "2025-03-19"
pages_build_output_dir = "./dist"

[[d1_databases]]
binding = "DB"
database_name = "my-d1-db"
database_id = "your-database-id"
Replace your-database-id with your actual D1 database ID.
3. Create API Routes for D1 Access
Create API endpoints in src/pages/api/:
src/pages/api/index.ts (Simple database health check):
import type { APIContext } from "astro";

interface CloudflareLocals {
  runtime: {
    env: {
      DB: any; // D1 database
    };
  };
}

export async function GET({
  locals,
}: APIContext & { locals: CloudflareLocals }) {
  try {
    const stmt = await locals.runtime.env.DB.prepare("SELECT 1 as test").run();

    return new Response(
      JSON.stringify({
        message: "D1 database connection successful",
        data: stmt.results,
        time: new Date().toISOString(),
      }),
      {
        status: 200,
        headers: { "Content-Type": "application/json" },
      }
    );
  } catch (error) {
    console.error("Database error:", error);
    return new Response(
      JSON.stringify({
        error: "Database error",
        message: error instanceof Error ? error.message : String(error),
      }),
      {
        status: 500,
        headers: { "Content-Type": "application/json" },
      }
    );
  }
}
4. Build and Test Locally with D1
npm run build
npm run preview -- --d1=DB
Visit http://localhost:8788/api to test D1 connection.
Step 5: Implement CRUD Operations
1. Create Database Table
Create a table in your D1 database:
CREATE TABLE IF NOT EXISTS items (
  id INTEGER PRIMARY KEY AUTOINCREMENT,
  name TEXT,
  description TEXT
);
2. Create API Endpoints for Items
Create file src/pages/api/items.ts for CRUD operations:
import type { APIContext } from "astro";
import { verifyAuth, unauthorizedResponse } from "../../utils/auth";

interface CloudflareLocals {
  runtime: {
    env: {
      DB: any; // D1 database
    };
  };
}

interface Item {
  id?: number;
  name: string;
  description: string;
}

// GET all items
export async function GET({
  locals,
  request,
}: APIContext & { locals: CloudflareLocals }) {
  // Check authentication
  if (!verifyAuth(request)) {
    return unauthorizedResponse();
  }

  try {
    const { results } = await locals.runtime.env.DB.prepare(
      "SELECT * FROM items"
    ).all();

    return new Response(
      JSON.stringify({
        success: true,
        data: results,
      }),
      {
        status: 200,
        headers: { "Content-Type": "application/json" },
      }
    );
  } catch (error) {
    console.error("Error fetching items:", error);
    return new Response(
      JSON.stringify({
        success: false,
        error: error instanceof Error ? error.message : String(error),
      }),
      {
        status: 500,
        headers: { "Content-Type": "application/json" },
      }
    );
  }
}

// POST - create a new item
export async function POST({
  request,
  locals,
}: APIContext & { locals: CloudflareLocals }) {
  // Implementation for creating a new item
  // See full code in the repository
}

// PUT - update an existing item
export async function PUT({
  request,
  locals,
}: APIContext & { locals: CloudflareLocals }) {
  // Implementation for updating an item
  // See full code in the repository
}

// DELETE - delete an item
export async function DELETE({
  request,
  locals,
}: APIContext & { locals: CloudflareLocals }) {
  // Implementation for deleting an item
  // See full code in the repository
}
3. Create Authentication Utilities
Create a simple authentication helper at src/utils/auth.ts:
// Basic authentication utility
const BASIC_PASSWORD = "password123";

/**
 * Verify the authentication from request headers or query parameters
 */
export function verifyAuth(request: Request): boolean {
  // Check for auth in headers (for API calls)
  const authHeader = request.headers.get("Authorization");
  if (authHeader) {
    // Simple password-based auth
    const password = authHeader.replace("Bearer ", "");
    return password === BASIC_PASSWORD;
  }

  // Check for auth in URL (for browser access)
  const url = new URL(request.url);
  const password = url.searchParams.get("auth");
  if (password === BASIC_PASSWORD) {
    return true;
  }

  return false;
}

/**
 * Create an unauthorized response
 */
export function unauthorizedResponse(): Response {
  return new Response(
    JSON.stringify({
      success: false,
      error: "Unauthorized - Authentication required",
    }),
    {
      status: 401,
      headers: {
        "Content-Type": "application/json",
        "WWW-Authenticate": "Bearer",
      },
    }
  );
}

/**
 * Create a redirect to login response
 */
export function redirectToLogin(): Response {
  return new Response(null, {
    status: 302,
    headers: {
      Location: "/login",
    },
  });
}
4. Create Test Endpoints
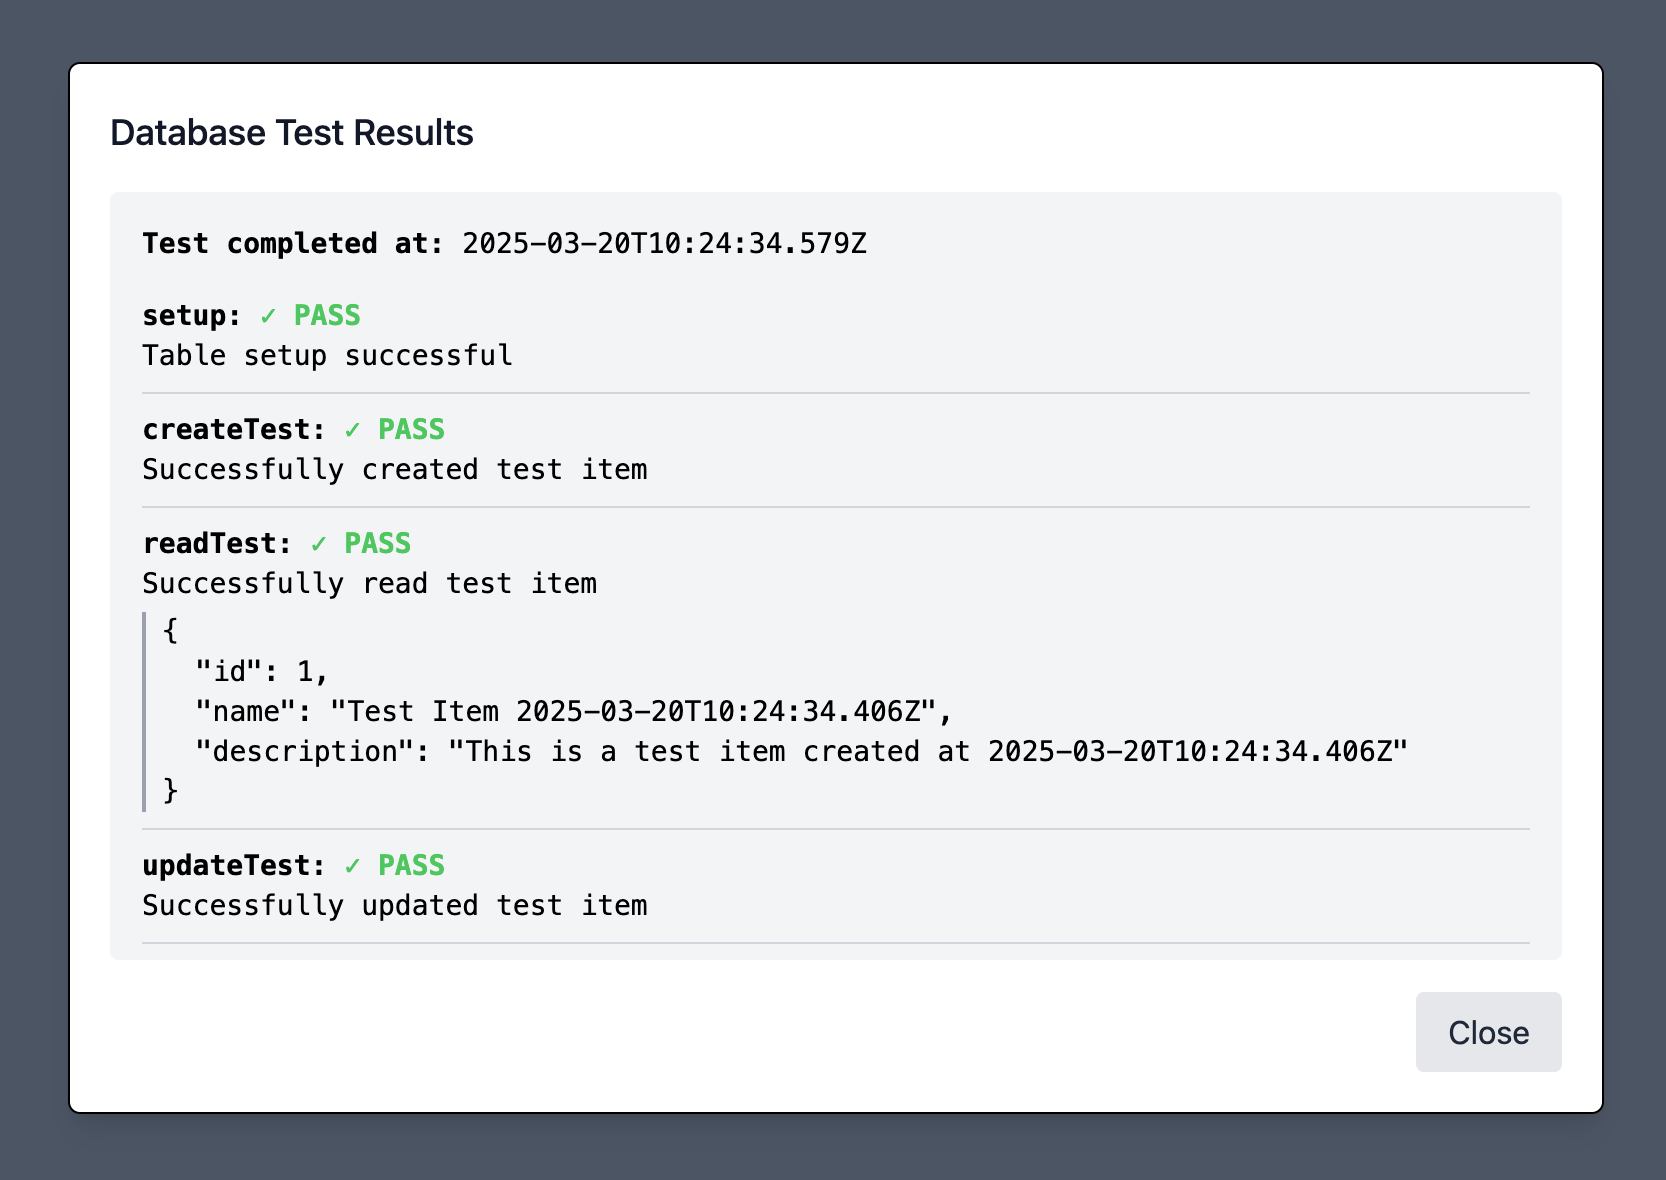
Add src/pages/api/test-items.ts for testing CRUD operations:
import type { APIContext } from "astro";
import { verifyAuth, unauthorizedResponse } from "../../utils/auth";

interface CloudflareLocals {
  runtime: {
    env: {
      DB: any; // D1 database
    };
  };
}

export async function GET({
  locals,
  request,
}: APIContext & { locals: CloudflareLocals }) {
  // Check authentication
  if (!verifyAuth(request)) {
    return unauthorizedResponse();
  }

  const testResults = {
    setup: { success: false, message: "" },
    createTest: { success: false, message: "", id: null },
    readTest: { success: false, message: "", data: null },
    updateTest: { success: false, message: "" },
    deleteTest: { success: false, message: "" },
    cleanup: { success: false, message: "" },
  };

  // Implementation of test operations
  // See full code in the repository

  return new Response(
    JSON.stringify({
      message: "CRUD Test completed",
      results: testResults,
      time: new Date().toISOString(),
    }),
    {
      status: 200,
      headers: { "Content-Type": "application/json" },
    }
  );
}
Step 6: Create UI Pages
1. Login Page
Create src/pages/login.astro:
---
import Layout from '../layouts/Layout.astro';
const errorMessage = Astro.url.searchParams.get('error') ? 'Invalid password. Please try again.' : null;
---
<Layout title="Login - Cloudflare Items Manager">
<div class="min-h-screen flex items-center justify-center bg-gray-50 py-12 px-4 sm:px-6 lg:px-8">
<div class="max-w-md w-full space-y-8">
<div>
<h2 class="mt-6 text-center text-3xl font-extrabold text-gray-900">
Sign in to access the Items Manager
</h2>
<p class="mt-2 text-center text-sm text-gray-600">
Please enter the password to continue
</p>
</div>
{errorMessage && (
<div class="rounded-md bg-red-50 p-4">
<div class="flex">
<div class="ml-3">
<h3 class="text-sm font-medium text-red-800">
{errorMessage}
</h3>
</div>
</div>
</div>
)}
<form class="mt-8 space-y-6" id="loginForm">
<!-- Form fields and JavaScript here -->
<!-- See full code in the repository -->
</form>
</div>
</div>
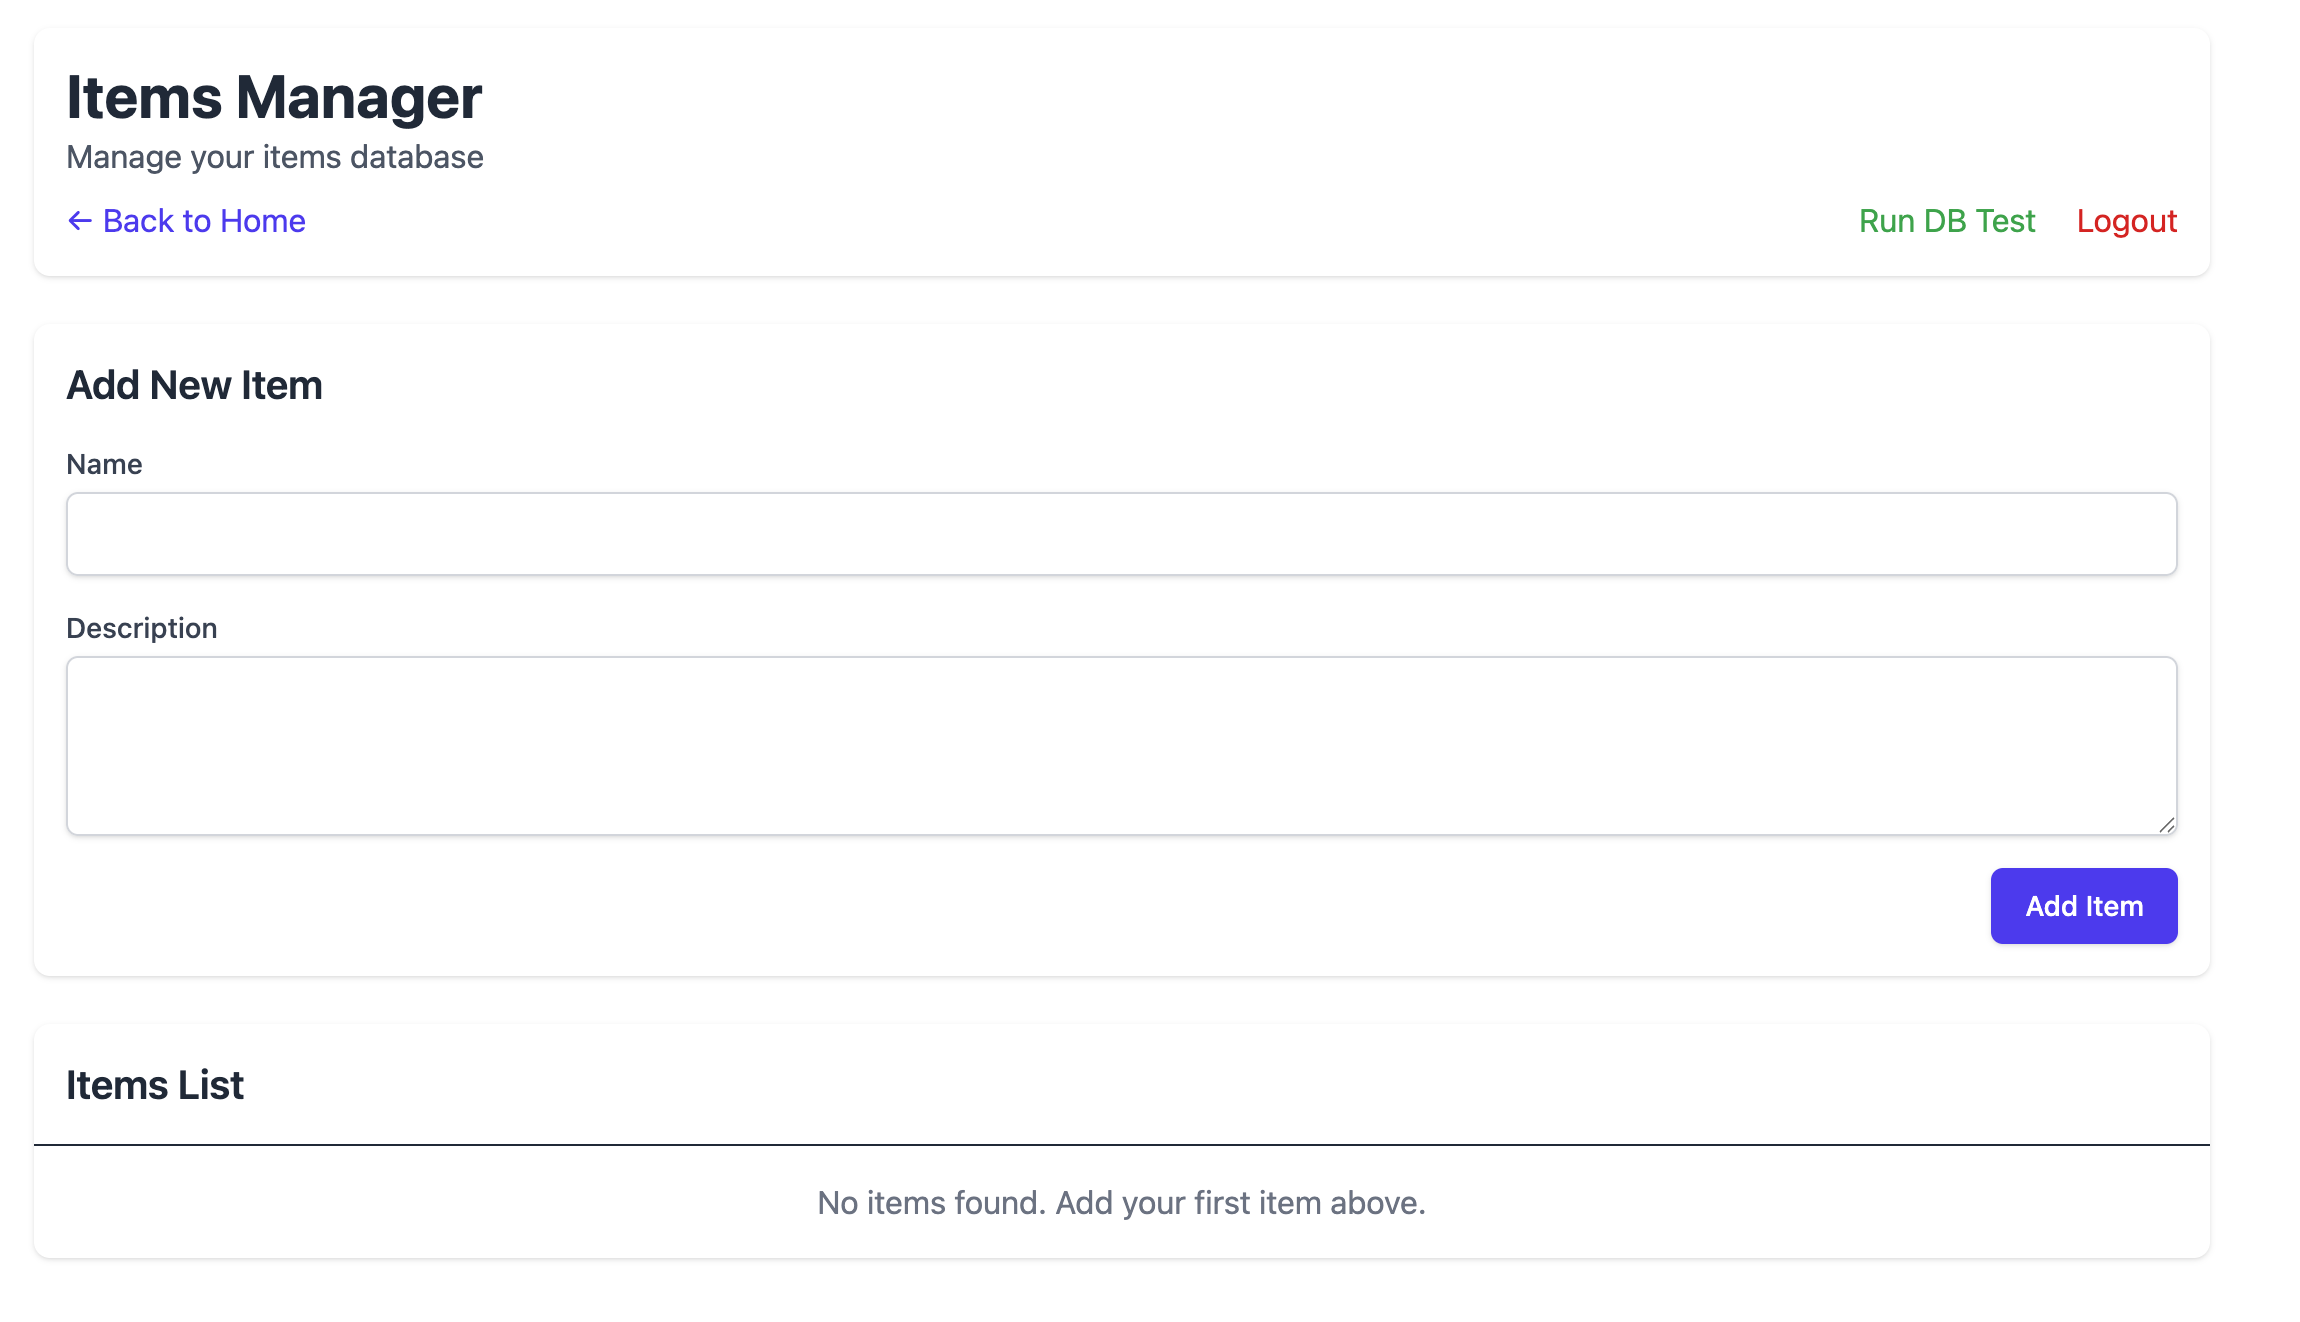
</Layout>2. Items Management Page
Create src/pages/items.astro:
---
import Layout from '../layouts/Layout.astro';
import { verifyAuth, redirectToLogin } from '../utils/auth';

// Check for authentication
const isAuthenticated = verifyAuth(Astro.request);
if (!isAuthenticated) {
  return redirectToLogin();
}

// Get all items from the database
let items = [];
try {
  // Database operations here
  // See full code in the repository
} catch (error) {
  console.error('Error fetching items:', error);
}

// Get the auth parameter for passing to API calls
const authParam = new URL(Astro.request.url).searchParams.get('auth') || '';
---

<Layout title="Items Manager">
  <div class="max-w-6xl mx-auto p-4 sm:p-6 lg:p-8">
    <header class="bg-white shadow rounded-lg mb-6 p-4">
      <h1 class="text-3xl font-bold text-gray-800">Items Manager</h1>
      <p class="text-gray-600">Manage your items database</p>
      <!-- Header content -->
    </header>

    <!-- Add Item Form -->
    <div class="bg-white shadow rounded-lg mb-6 p-4">
      <!-- Form content -->
    </div>

    <!-- Items List -->
    <div class="bg-white shadow rounded-lg">
      <!-- Items display -->
    </div>

    <!-- Client-side JavaScript for CRUD operations -->
    <script define:vars={{ authParam }}>
      // JavaScript code for handling forms, modals, and CRUD operations
      // See full implementation in the repository
    </script>
  </div>
</Layout>
Step 7: Deploy to Cloudflare Pages
1. Push to GitHub
git add .
git commit -m "Initial commit"
git push origin main
2. Connect Your Repository to Cloudflare Pages
- Go to Cloudflare Dashboard > Workers & Pages > Create application
- Connect your GitHub repository
- Configure the build settings:
- Build command:
npm run build - Build output directory:
dist
- Build command:
- Add the D1 binding:
- Variable name:
DB - Select your D1 database
- Variable name:
3. Deploy and Test
After deployment, visit your Cloudflare Pages URL to test the application:
/api: Test D1 connection/login: Enter password “password123” to access the app/items?auth=password123: Items management interface
Troubleshooting
D1 Connection Issues
If you encounter D1 connection issues:
- Verify your wrangler.toml configuration is correct
- Ensure you’re passing the
--d1=DBflag when running the preview
npm run preview -- --d1=DB- Check permissions in the Cloudflare dashboard
API Route Structure
Note that API routes in Astro are built in the src/pages/api directory, not in a separate functions directory. Each TypeScript file automatically becomes an API endpoint.
Enjoy your Astro + Cloudflare + D1 project! If you need any help, feel free to reach out.
Please give the repository a star on GitHub